The HIPAAtizer platform allows you to add ‘Canvas’ components to your forms. Canvas components can be used to add interactable images to your form, which patients can use to illustrate specific issues – for example, highlighting areas they’re experiencing pain on a sample body diagram. This guide will walk you through the process of how to embed the new canvas in your form.
Creating a form with drawable functionality (adding a “Canvas” component):
Step 1: In HIPAAtizer open Form Builder, either by opening an existing form by clicking on the form name in the “My Forms” dashboard or by creating a new form from scratch.
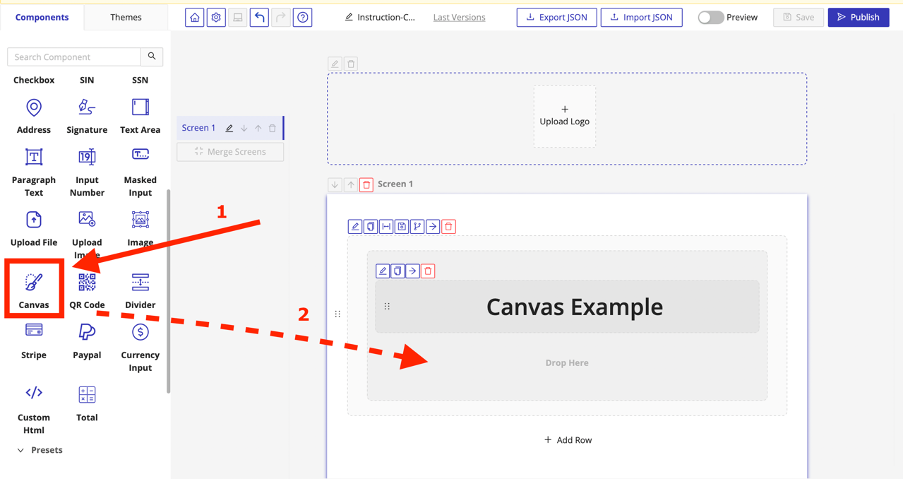
Step 2: Locate the “Canvas” component (1) in the form builder and drag and drop it to an appropriate row (2).
Step 3: Upload an Image (or “blank canvas”)
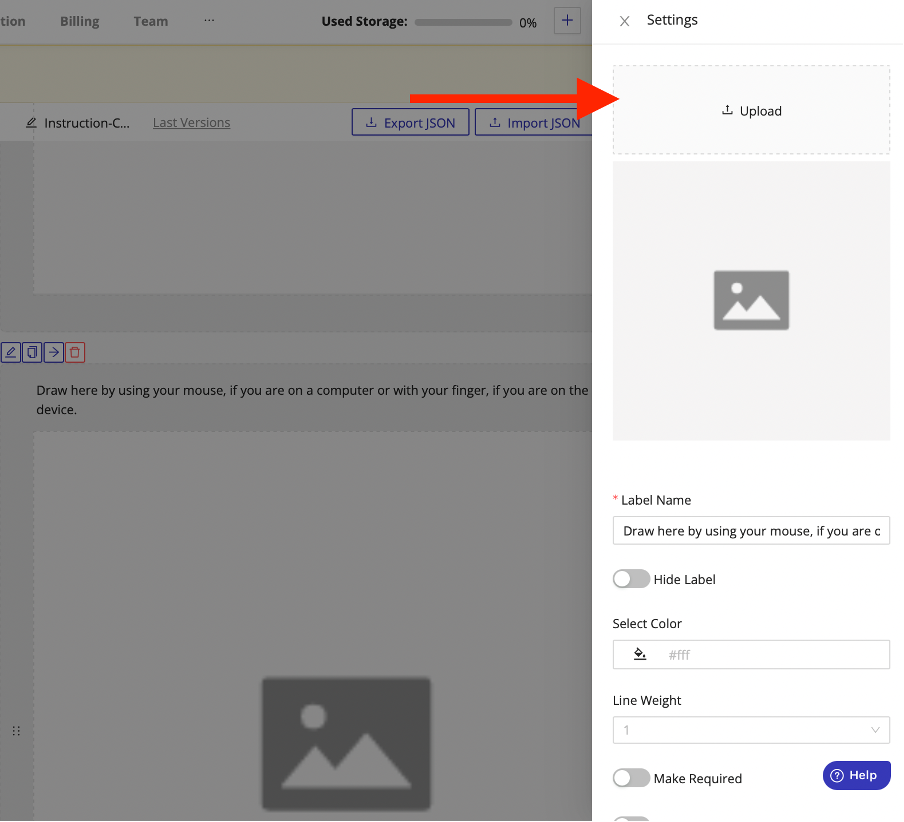
Upon “dropping” the Canvas Component into the form, a Settings window will open. From this Settings window, you should click on “Upload” to upload the desired HIPAA diagram or blank canvas.
Step 4: Setting Component Label and User Instruction
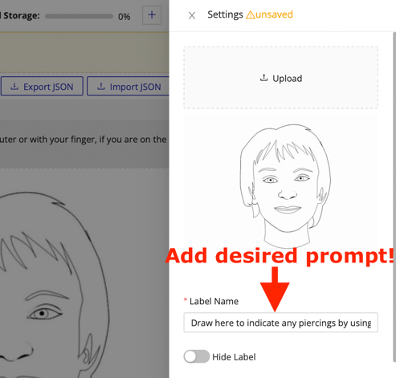
The “Label Name” is the prompt or instruction that the user sees when they are filling out the form. In this example, the user is asked to indicate any piercings when they are filling out the form.
Step 5: Adjusting Settings for the Canvas.
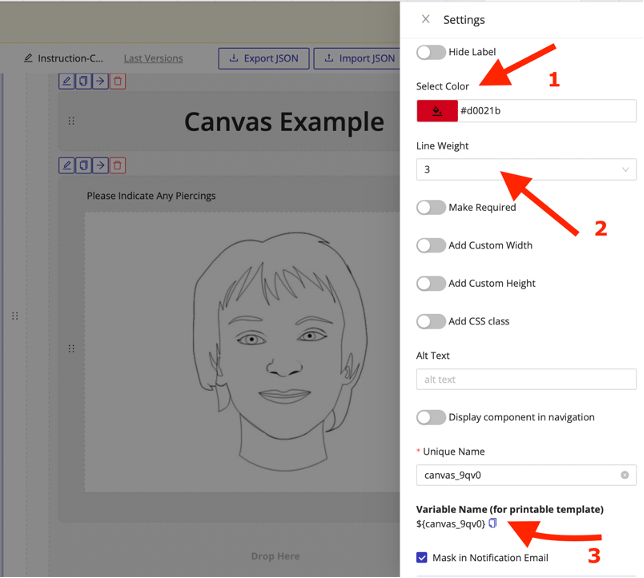
The main settings for the Canvas component include the color and weight of the lines that will be drawn. To adjust these, in the “Settings” window, you can select a color (1) that will be used to draw on the Canvas, a thickness to the lines (2) and don’t forget to note the unique name (3) if you are linking the form to a printable PDF template. After adjusting these settings, click “Save Changes” at the bottom of the “Settings” window.
Step 6: Finalize your form:
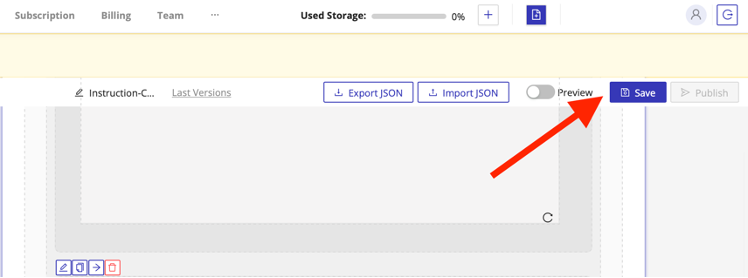
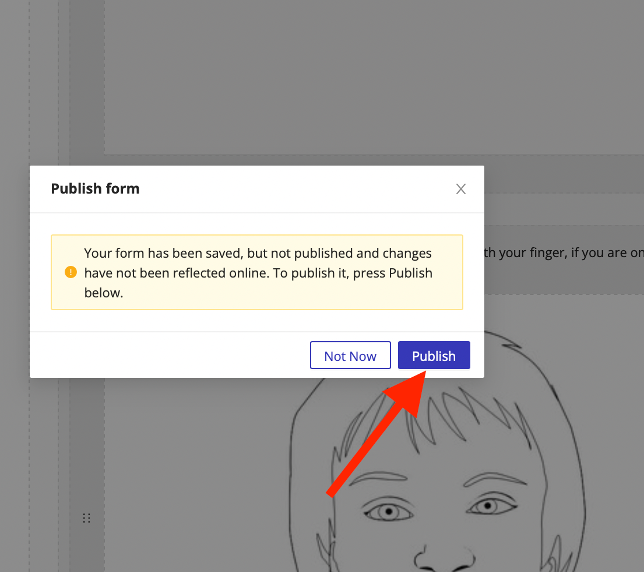
Add or edit any additional fields. Once you have finalized the form, press “Save” and “Publish” in the form builder.
Using Canvas
Step 1: Checking or Previewing the Form
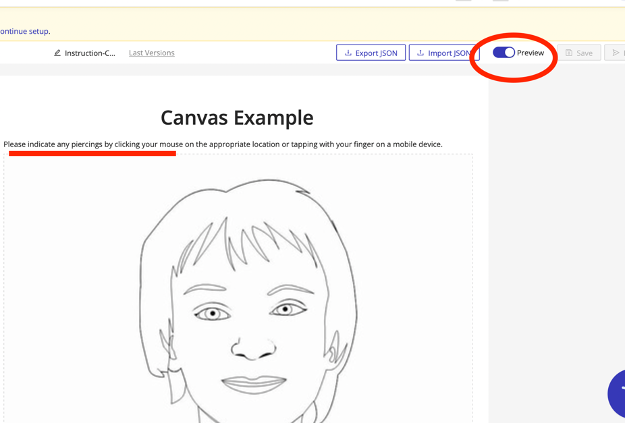
In either the “Preview” mode or simply as a regularly published form, you can see how the user will be prompted to complete this part of the form.
Step 2: Drawing on the Canvas
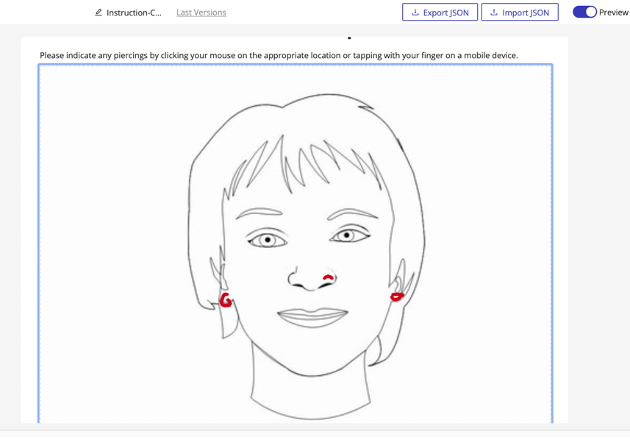
Either in “Preview” mode (as below) or by embedding the form on a website or generating a link, the respondent can simply indicate the required information with their computer mouse or, if on a mobile device, with their finger. As you can see below, the respondent has three piercings.
Embedding or Activating the Form with a Canvas Component
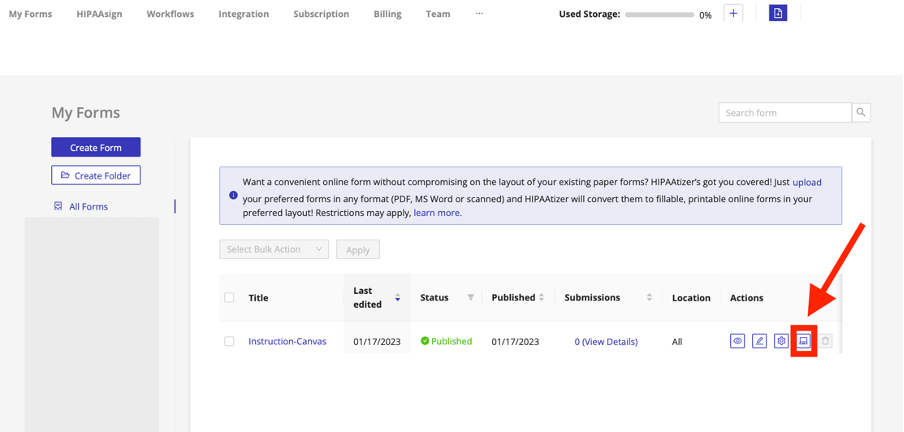
In the “My Forms” dashboard, click on “Embed Form” (see screenshot below):
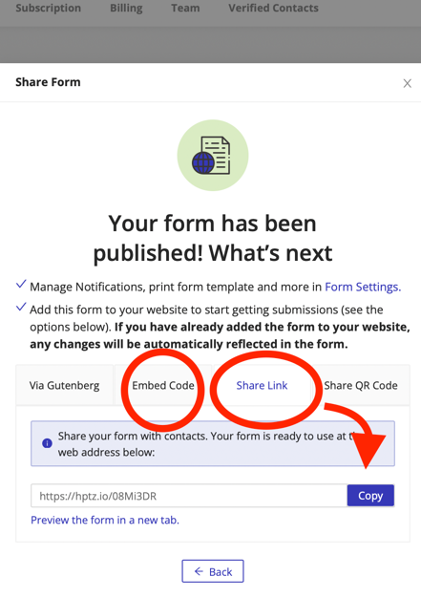
There are four options for embedding available. The most common forms of embedding and sharing are to click “Embed Code” and follow the instructions, or click “Share Link” and then “Copy” to copy the link into an email to clients.
Accessing and Downloading Submissions
Step 1: Accessing Submissions
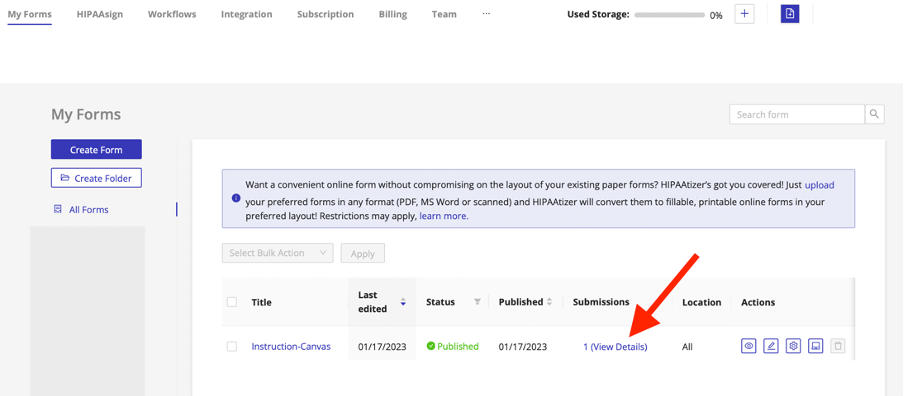
From the “My Forms” dashboard, click on #(View Details) to enter the “Submissions” dashboard.
Step 2: Accessing A Submission
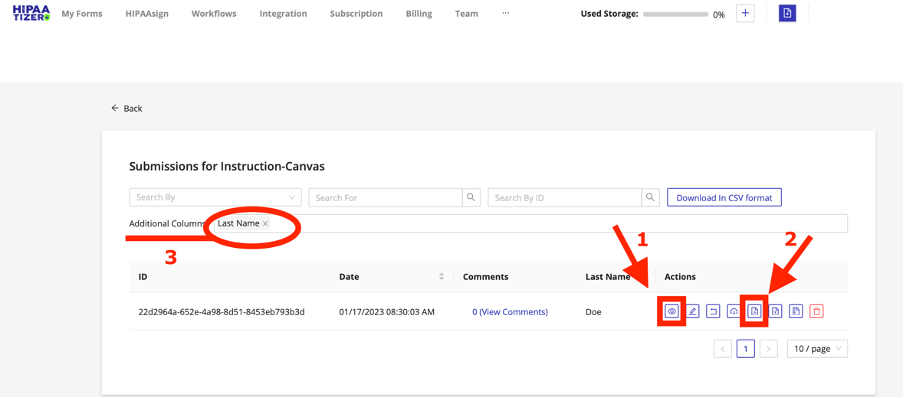
In the “Submissions” dashboard, to view the form on your screen:
Click on (1) “View Details” or, to download a PDF of the submission, click on (2) “Download PDF”.
You may also set the “Additional Columns” to an appropriate value (3) in order to better sort and identify submissions.
As a reminder, if you want a customized canvas, you should attach a print template in the Form Settings. Contact us at support@hipaatizer.com to help convert or create a template.
Still have questions? Contact us