Through the HIPAAtizer platform it’s possible to set up multiple Locations and assign forms and team members to different Locations. Below are instructions on how to add Locations to your account, and how to assign team members and forms to Locations.
Locations are important for HIPAA access control reasons, i.e. manage which form submissions go to which team members. In addition, if multiple doctors (Covered Entities) are responsible for different locations, Locations allows you to control the routing of forms and submissions that are under one account.
Setting Up Your Locations
This can only be done by the Account Owner or Security Officer.
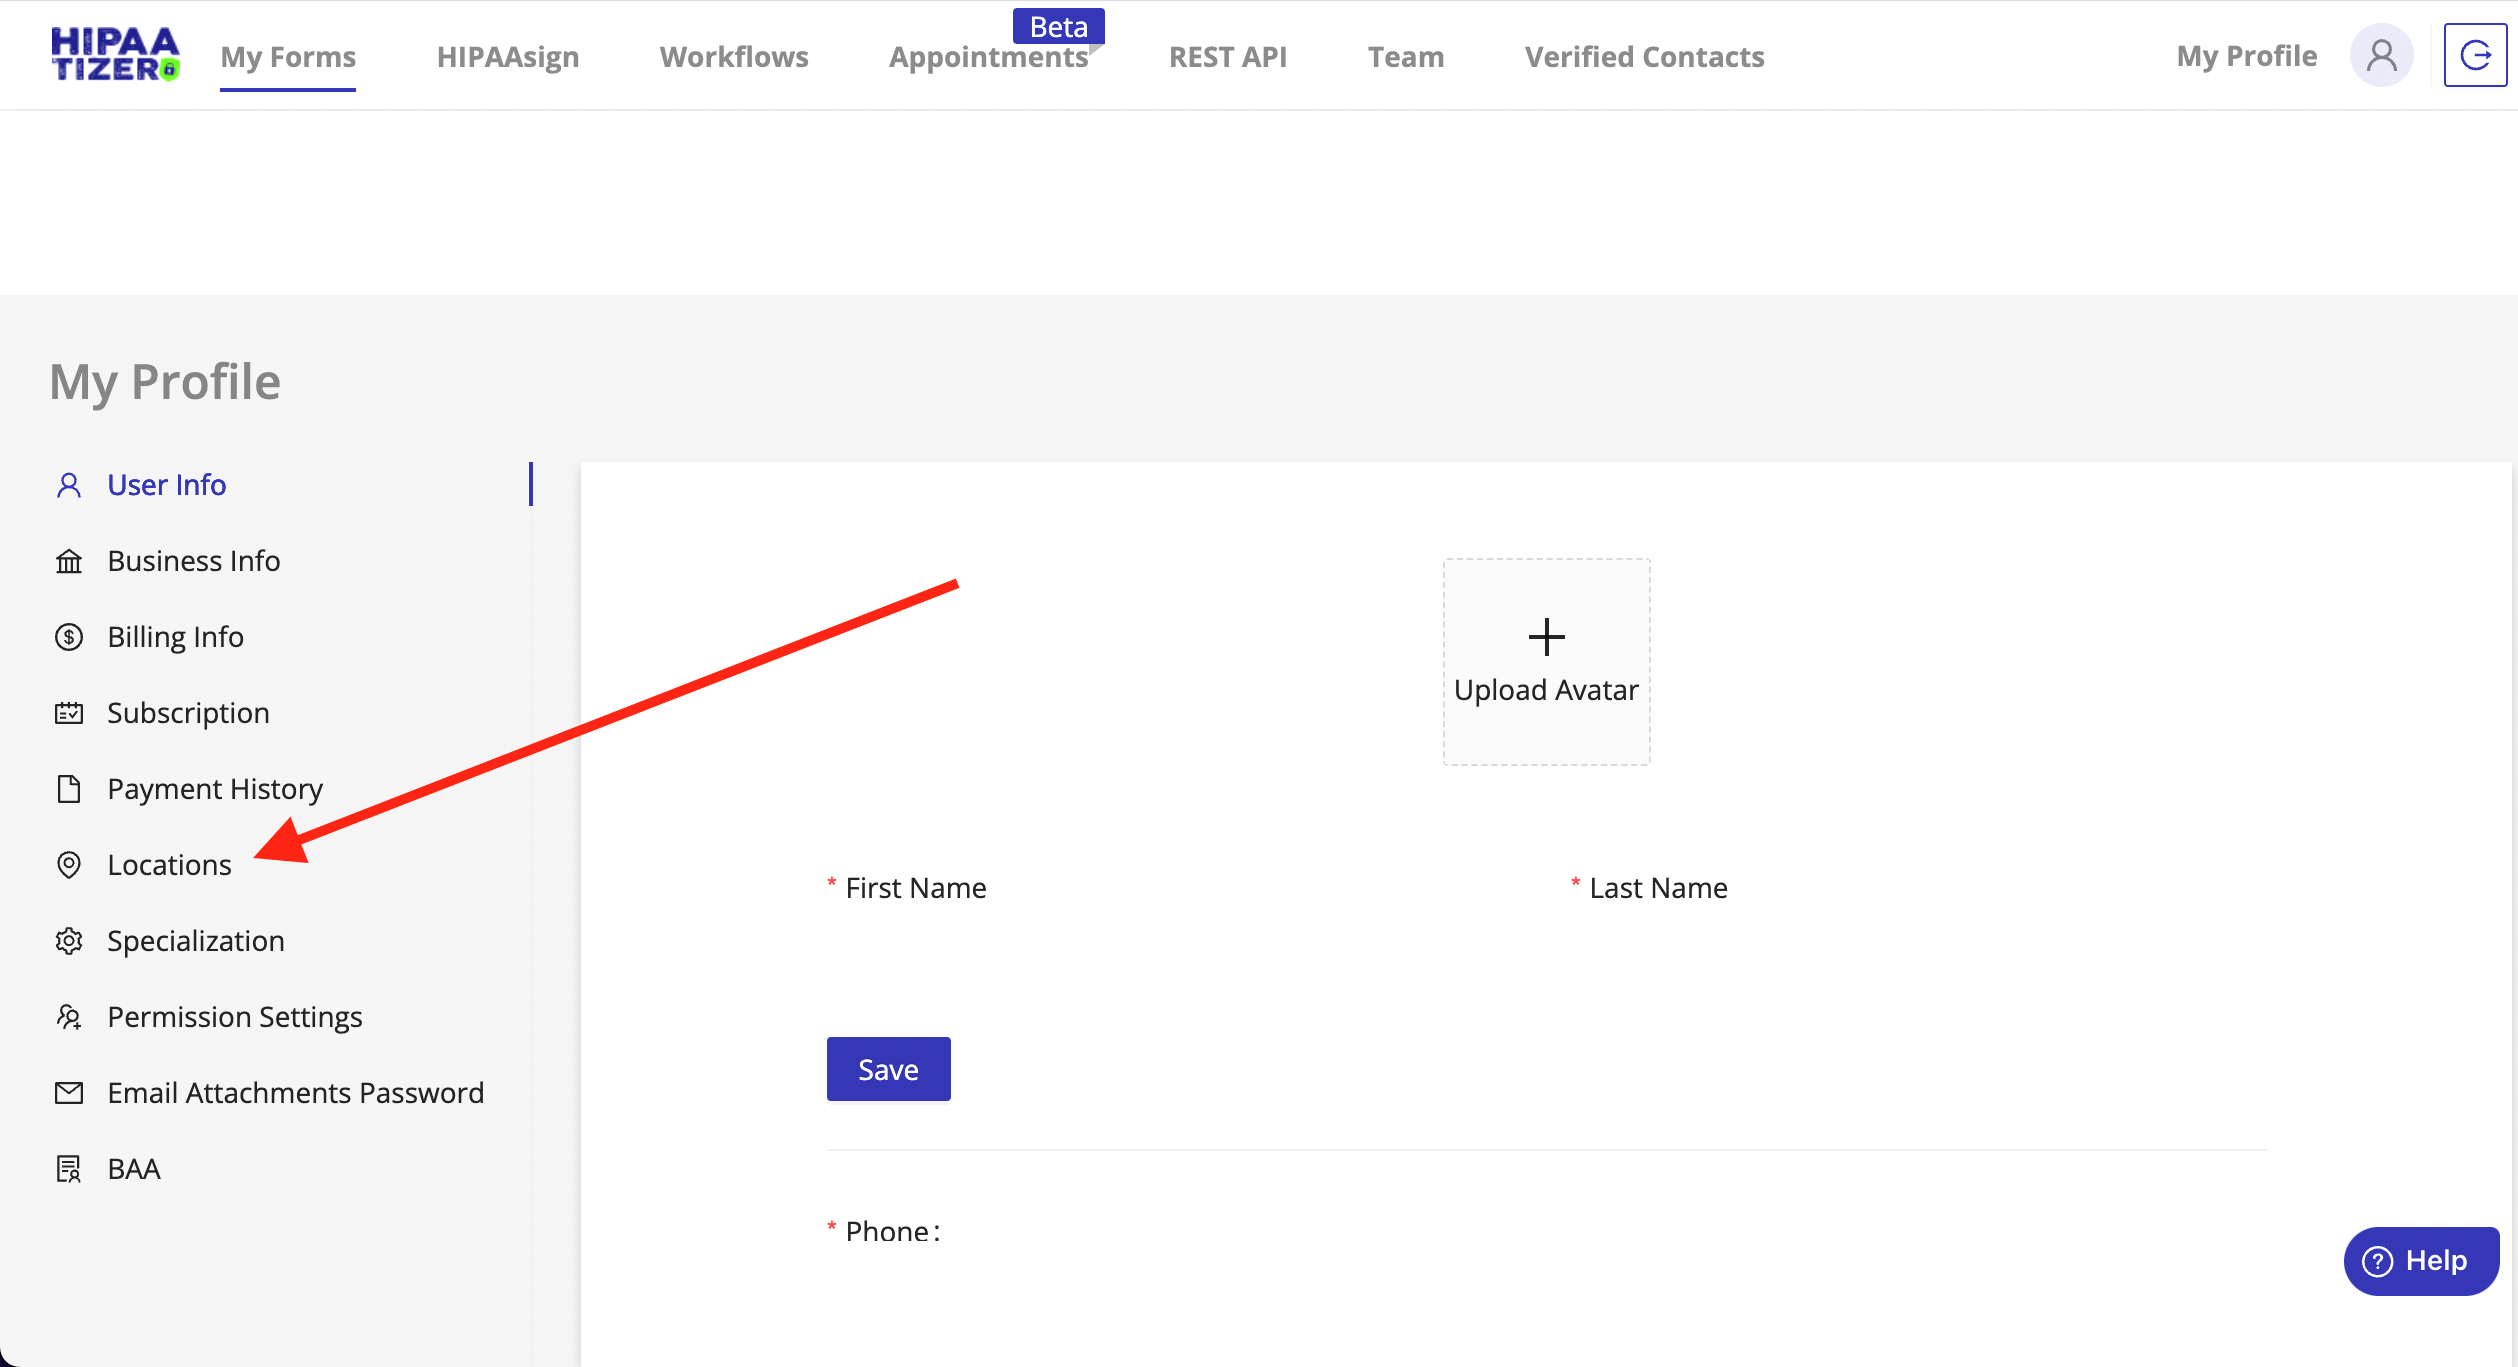
1. From the HIPAAtizer dashboard, click on “My Profile”-> “Go To Profile Settings”.

2. Click on Locations.
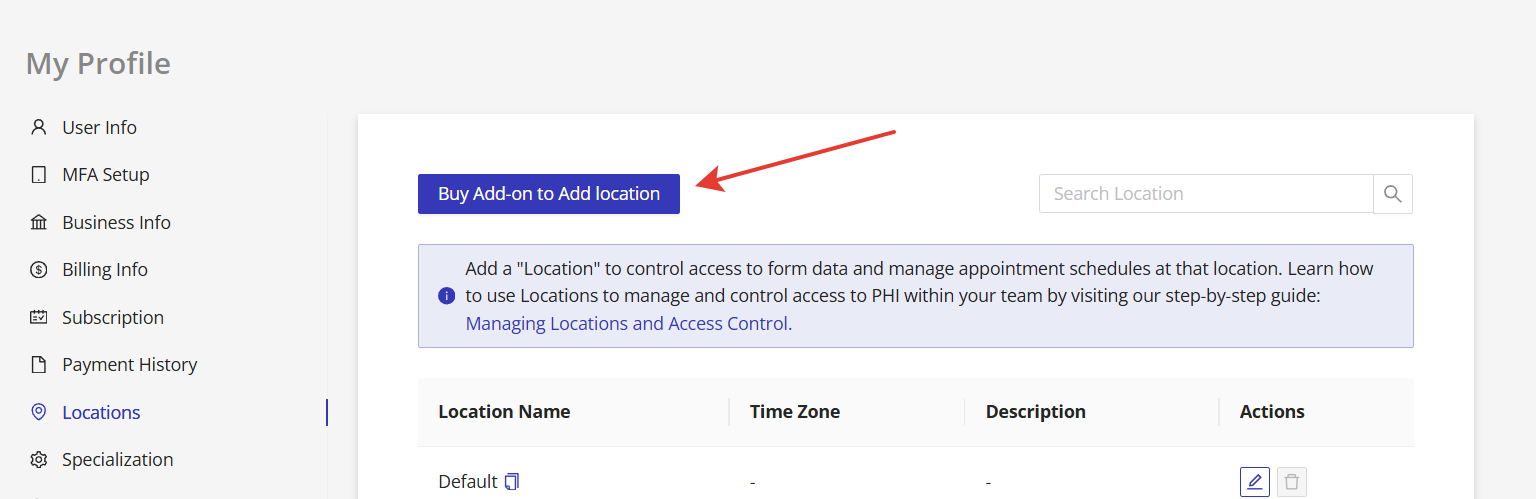
3. Each account starts with one Location, called “Default”, that is accessible to all Team members. You can assign forms, Team members, and change permissions for this Location. You can also edit the name of your existing Location.

4. To create a new Location (or department with different access rights), click on “Buy Add-on to Add Location”. Location pricing is variable depending on which plan you are subscribed to.
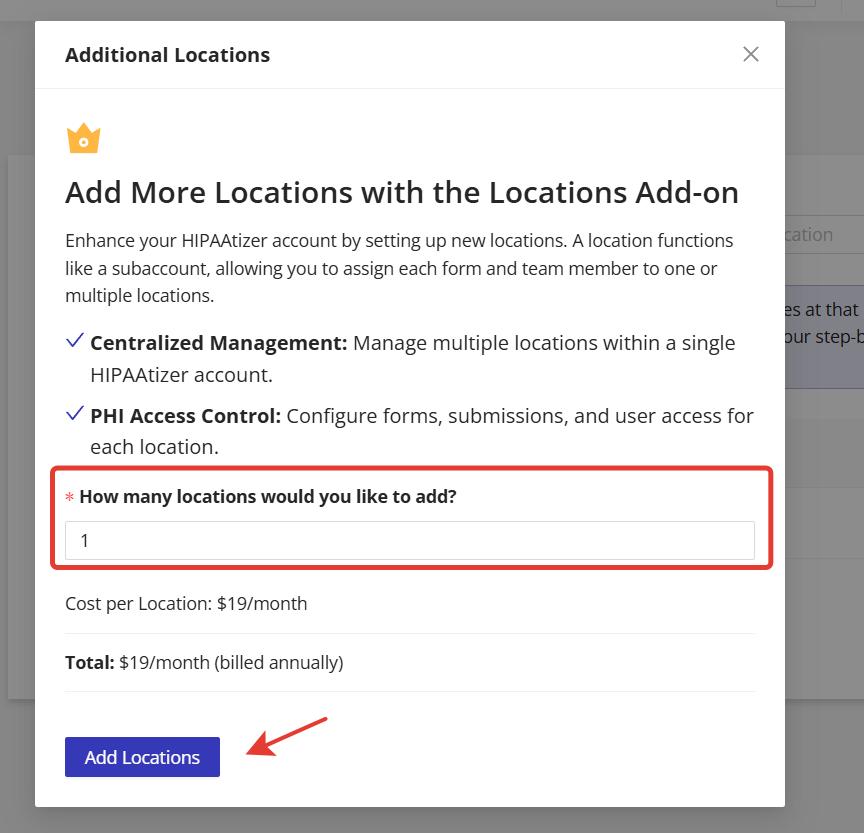
5. In the modal window choose the number of Locations you want to add, then click on the “Add Locations” button.
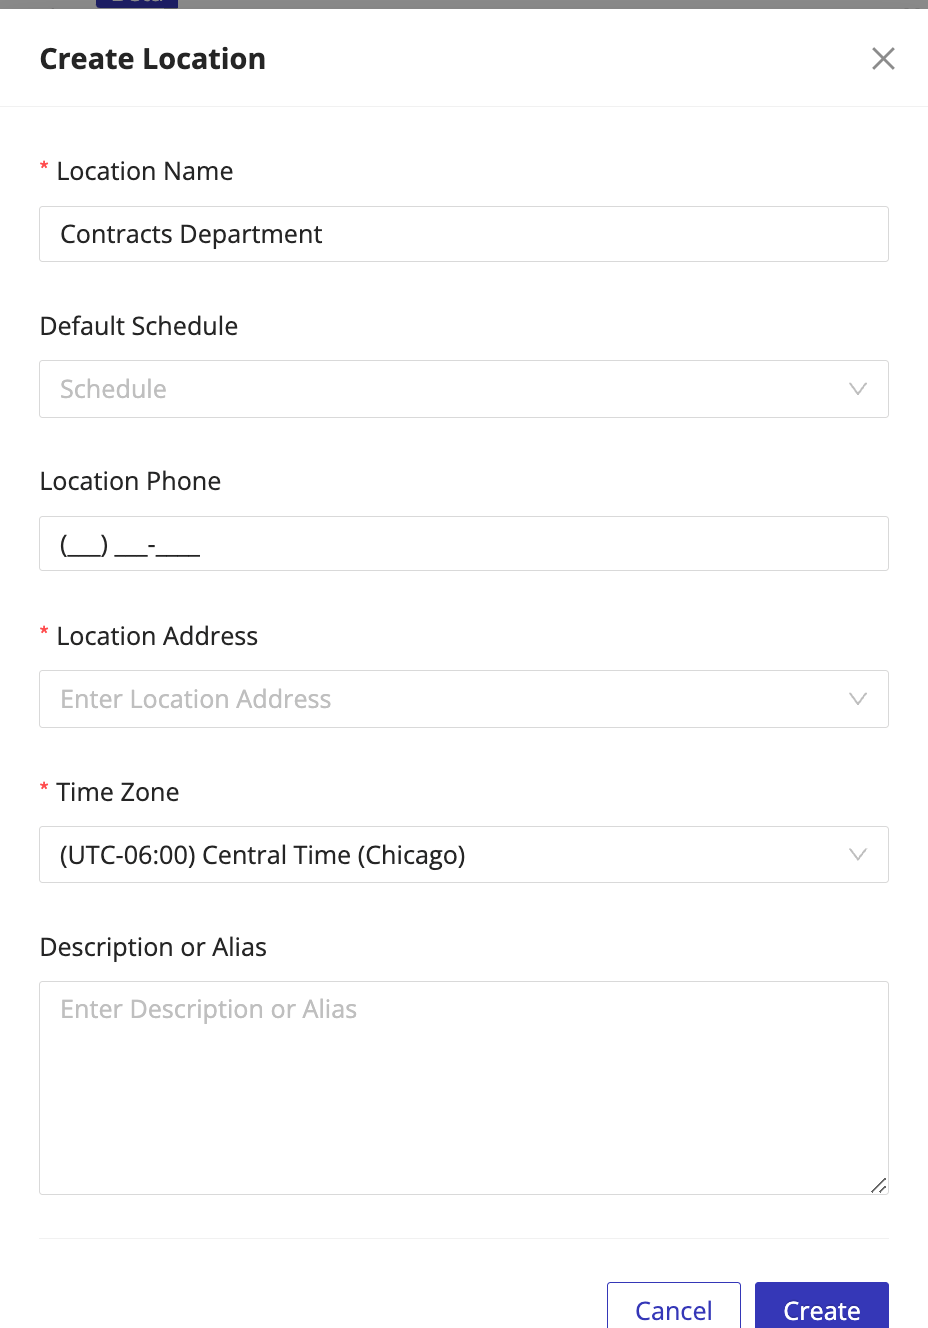
6. When the modal window opens, add the necessary information to create a new Location and click “Create” at the bottom:
Now that the new Location has been created, you need to set the access parameters for your users.
Access Parameters for Individual Users
By default the ‘Security Officers’ role has full access rights, and the ‘Assistants’ role has limited functionality and access. The limits and the functionality that they have access to is visible when you click on “Security Officers” or “Assistants”
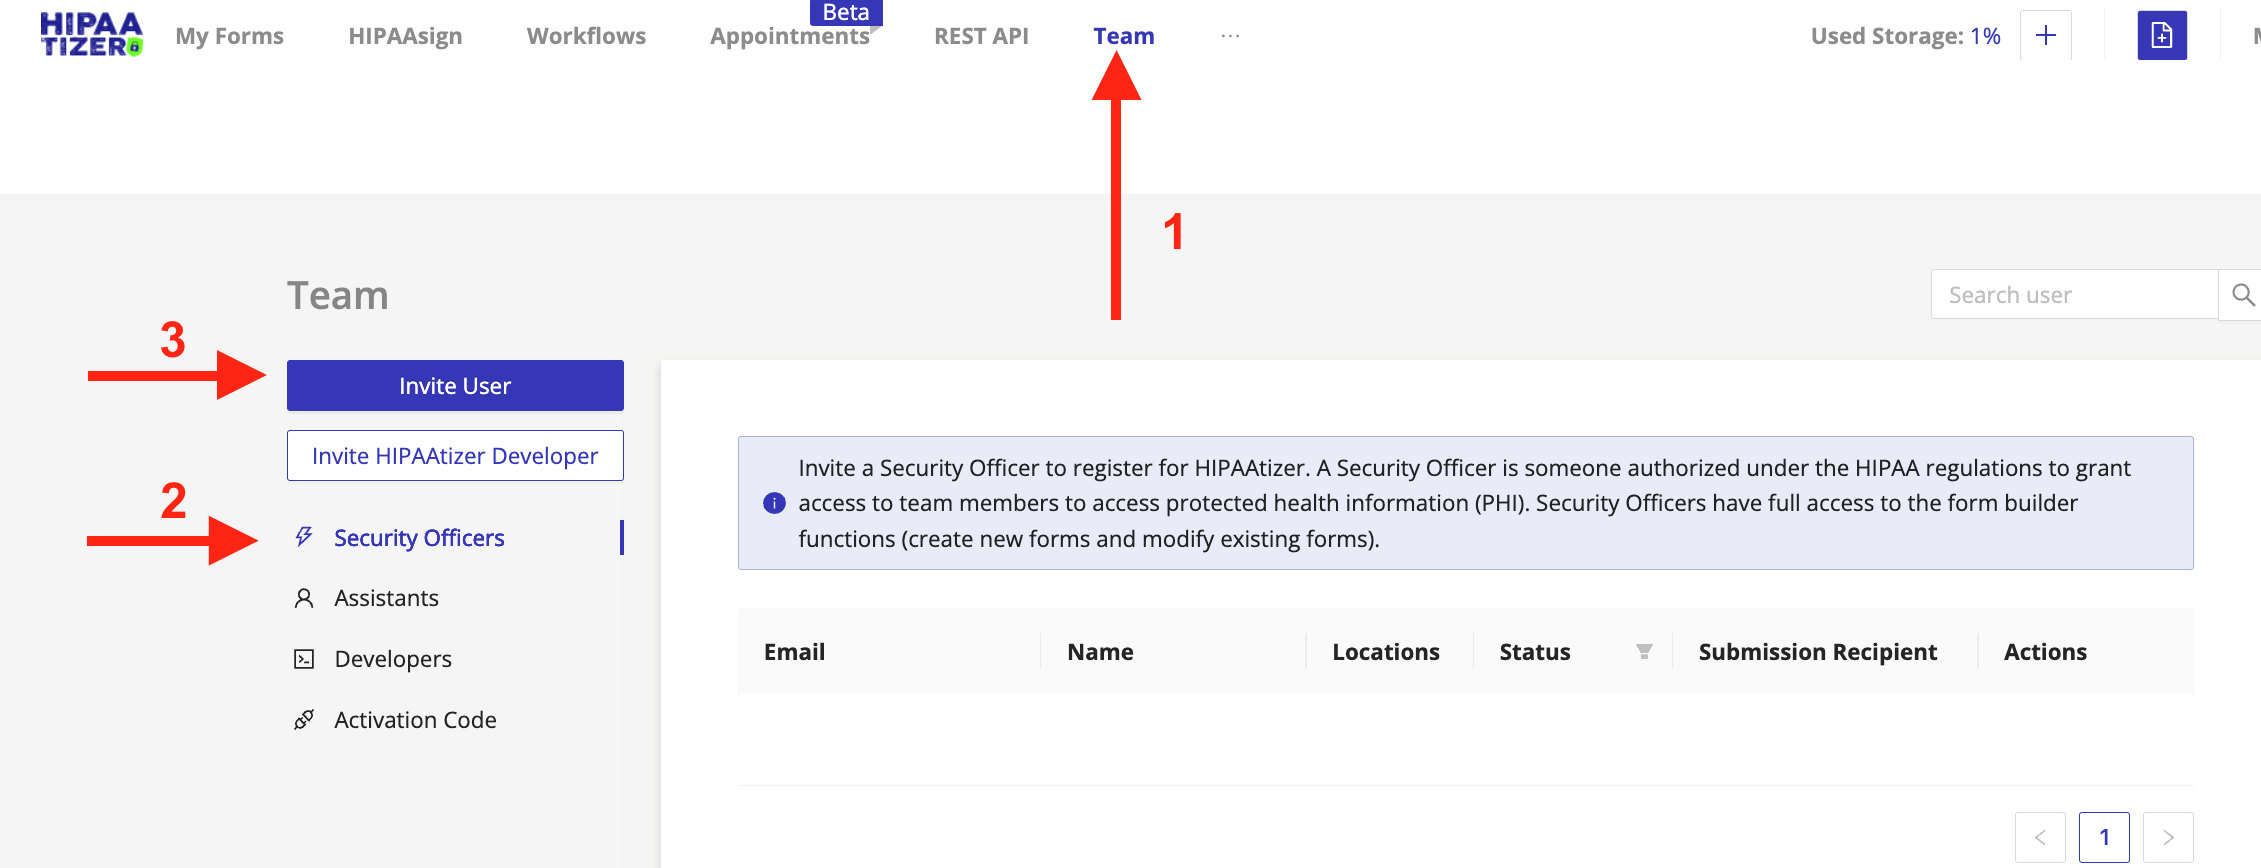
1. From the HIPAAtizer dashboard, go to (1) Team, select the desired role, (2) then (3) Invite User.
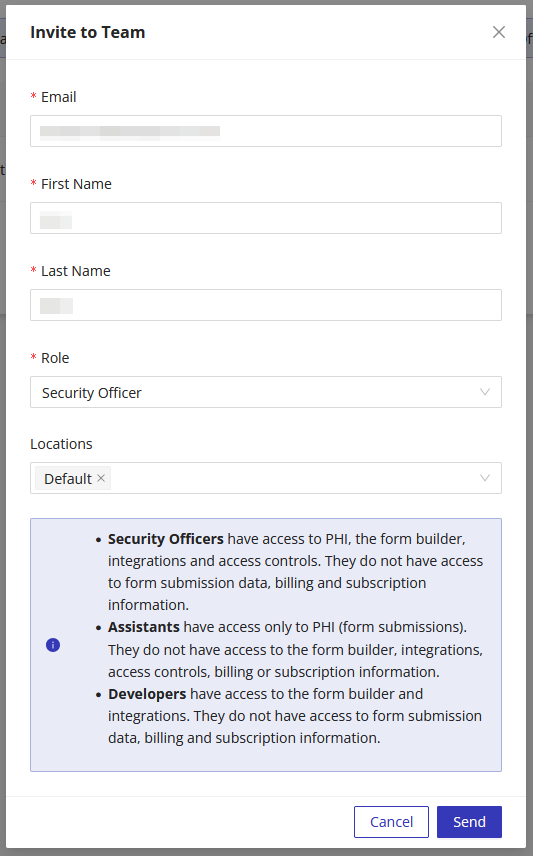
2. Fill-in the information in the modal window below. Pay special attention to the Locations field below.
Please note: As a default, all forms and all team members have access to all Locations. When you create a new Location, you must assign each relevant form to the new Location and each Team Member’s profile needs to be adjusted for access. See the next steps on how to do this.
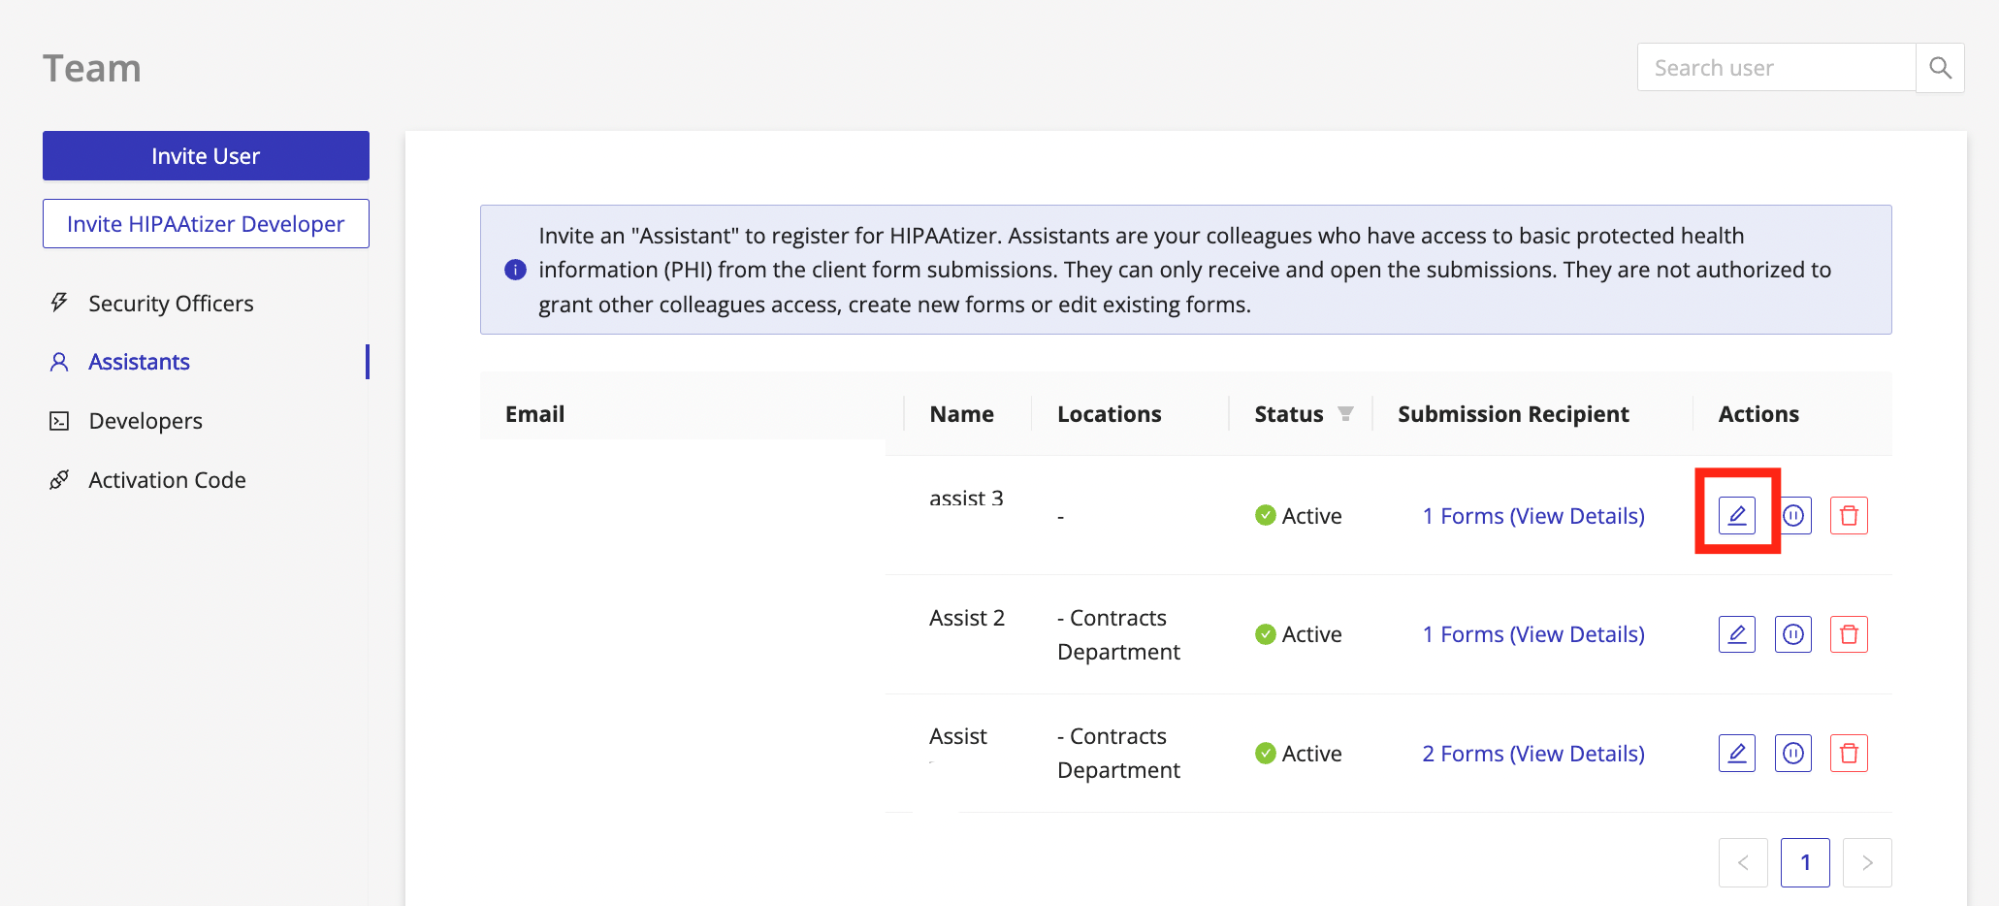
Each Team Member is assigned to all Locations by default. To assign them to a specific Location:
1. Go to the Team dashboard, identify the particular Team Member you would like to assign to a particular Location and click on edit under Actions.
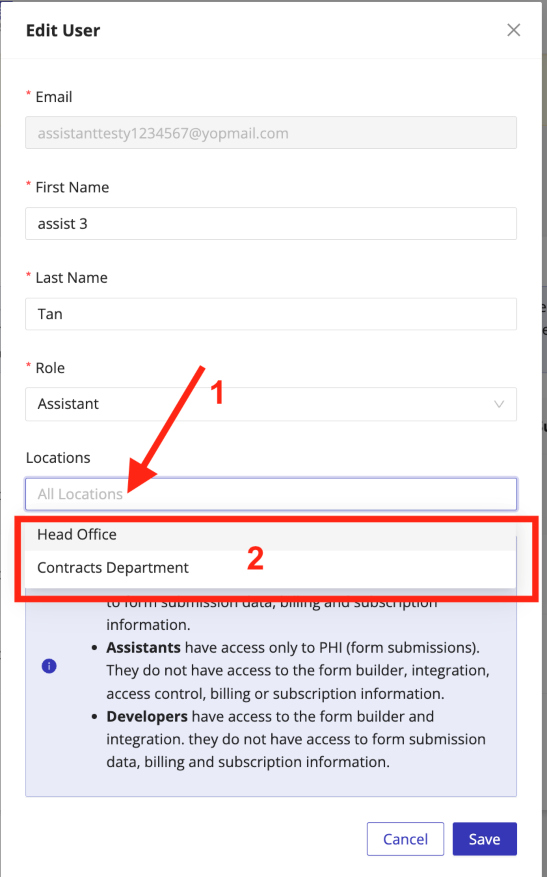
2. In the modal window, click on (1) Locations then (2) select which Location you would like to assign the Team Member and press “Save”. Team members can be assigned to multiple locations, if needed.
Assigning a form to a “Location”
By default, all forms are assigned to all Locations. To limit a form to a particular Location, follow the steps below.
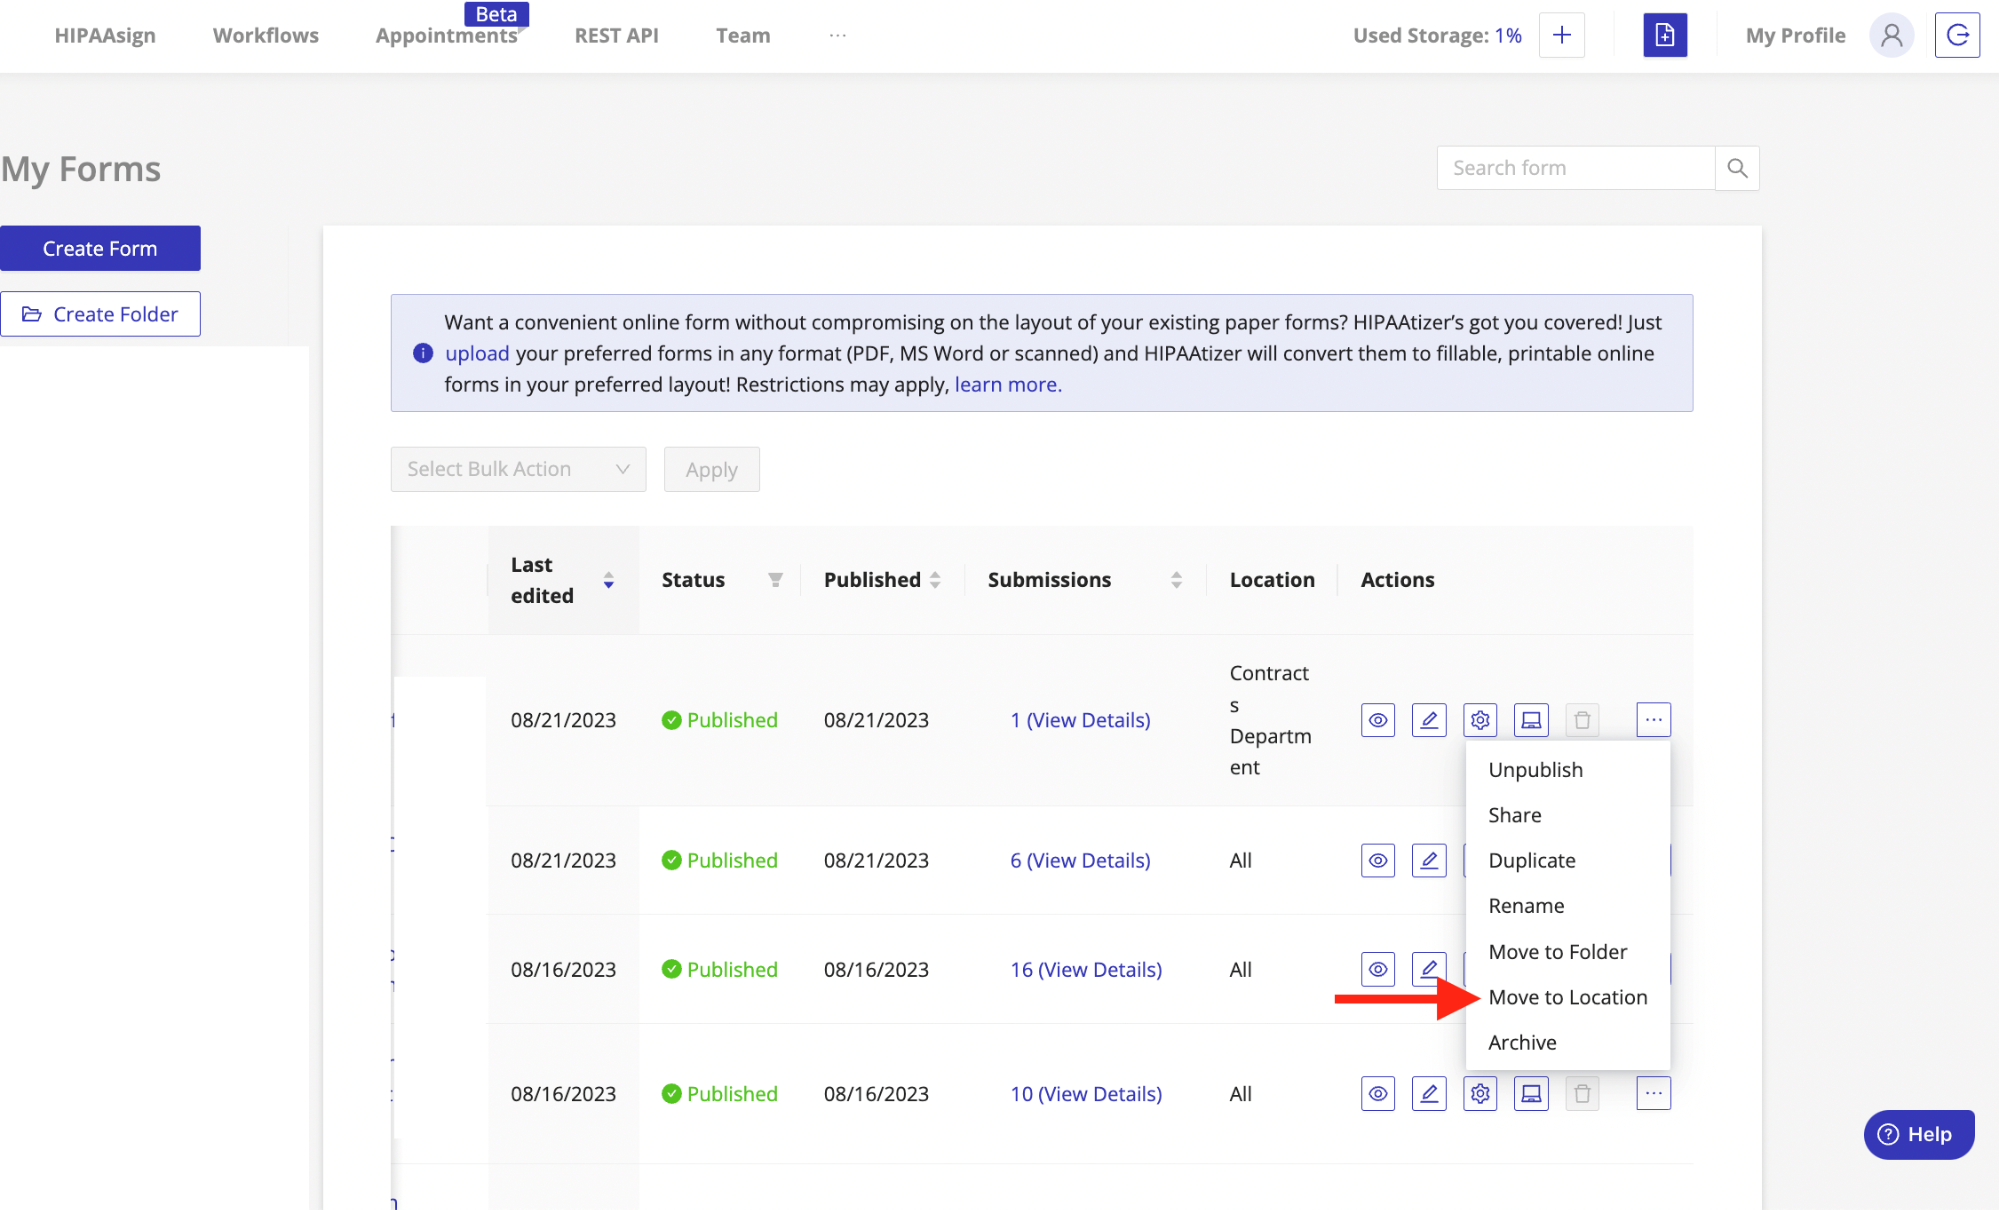
1. From the My Forms dashboard, choose the particular form you would like to assign to a particular Location and, under “Actions” click on “Move to Location”.
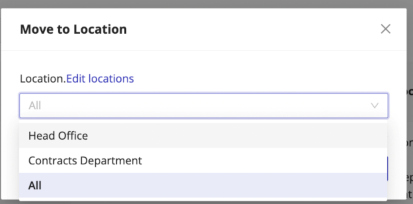
2. When the modal window opens, choose a Location. You can also select ‘All’ if the form should be accessible to everyone at all “Locations”.
Still have questions? Contact us