Follow the steps below to incorporate a HIPAAtizer form into your Shopify website:
Preparing your Shopify page
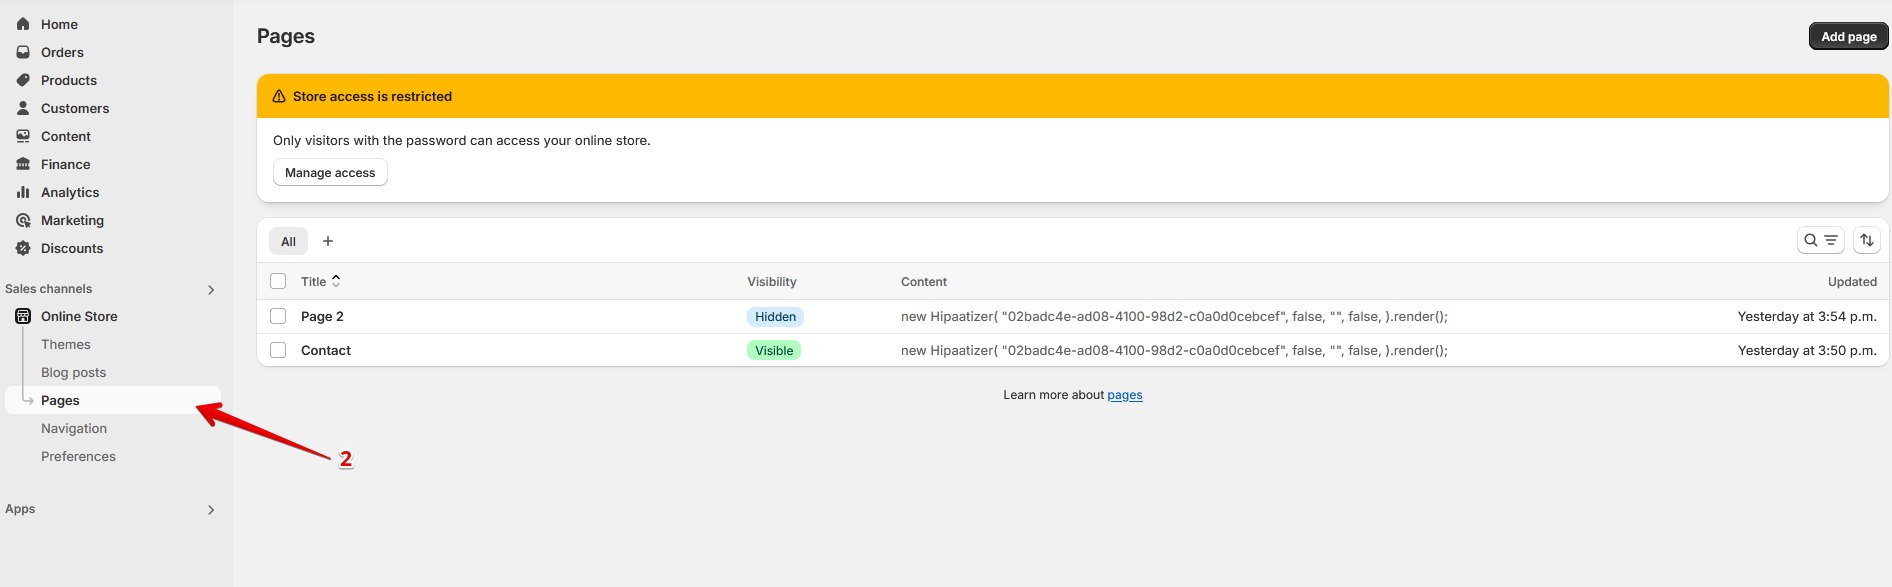
Step 1. Log in and Navigate to Your Store’s Pages: From the dashboard, select “Online Store,” and then choose “Pages.” This is where you’ll find all the pages of your website.
Step 2. Edit Your Page: Click on the page you wish to edit or where you want to embed the HIPAAtizer form. If you’re adding a new form to a new page, you may need to create a new page first.
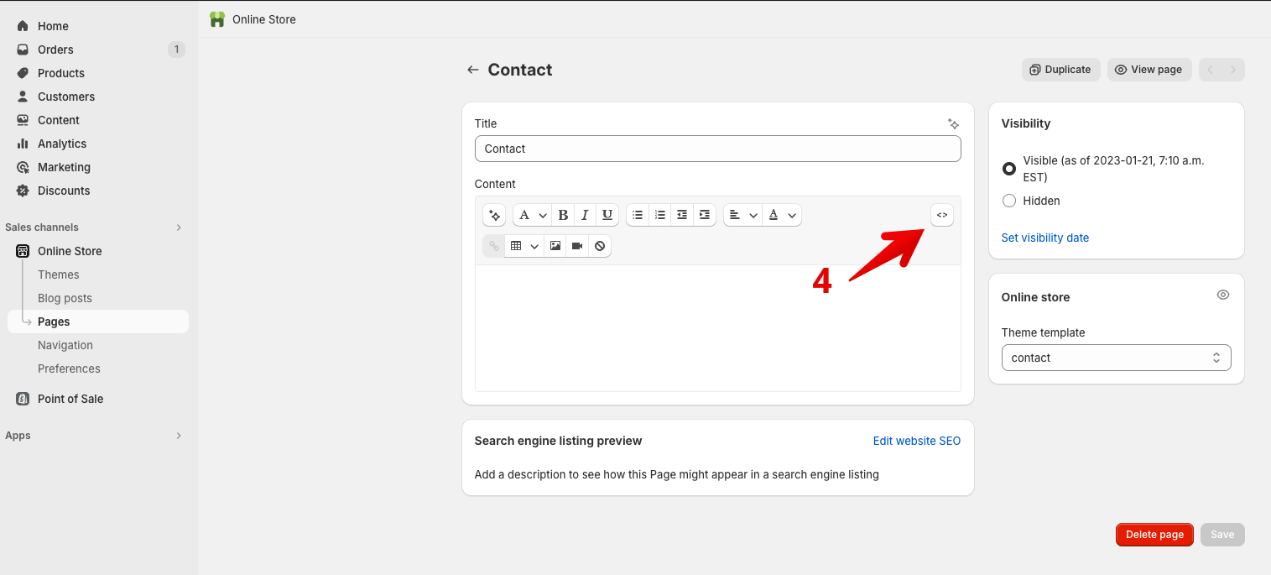
Step 3. Switch to HTML View: In the page editor, look for the “Show HTML” button, usually located at the top right corner of the Content section. Clicking this will switch the editor to HTML mode, allowing you to insert code directly.
Embedding your forms
To embed your forms into Shopify, you need to retrieve the unique embed code for your form from HIPAAtizer.
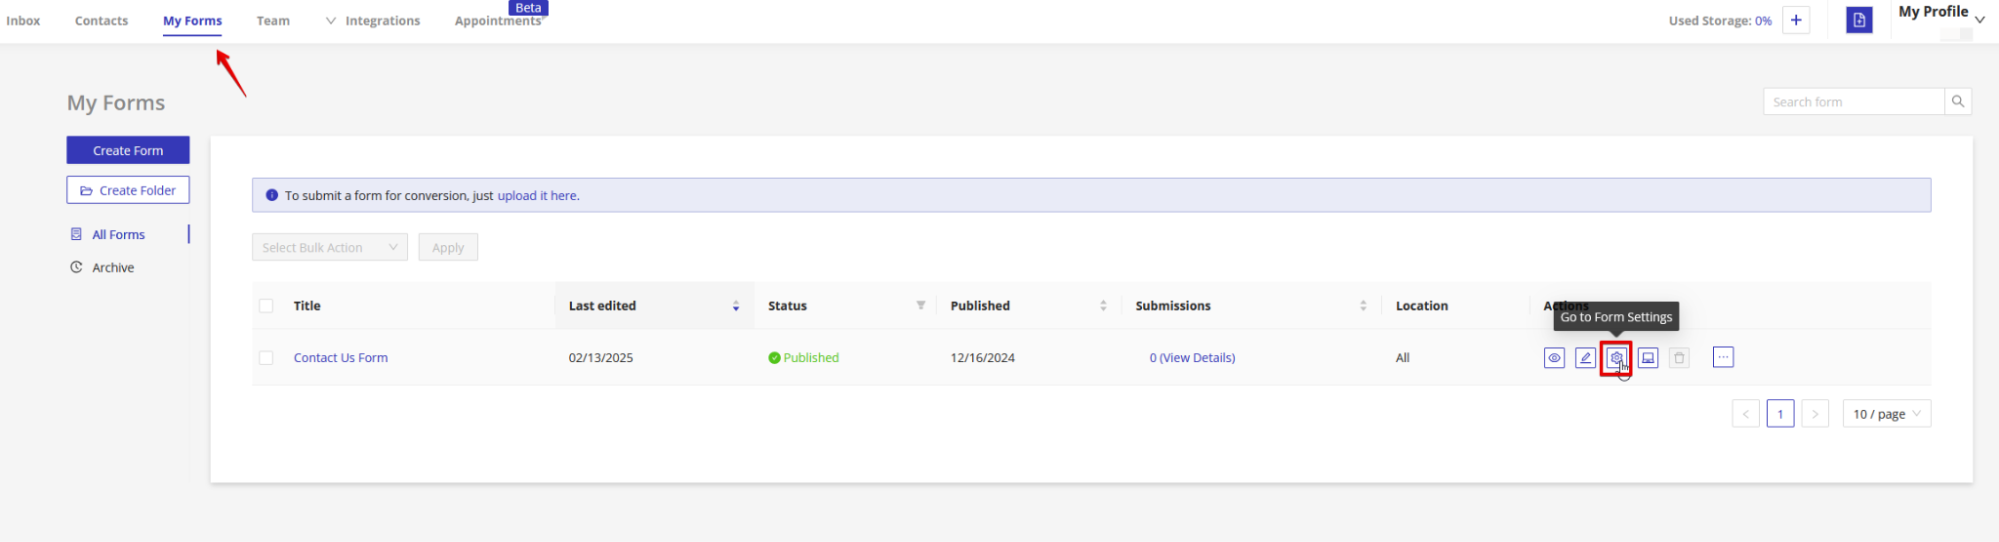
Step 4. In HIPAAtizer, navigate to the ‘My Forms’ page on your HIPAAtizer dashboard, and select ‘Go To Form Settings’ under ‘Actions’ for the form you want to embed.
Step 5. Click the ‘Integrations’ tab, and then ‘Shopify’.
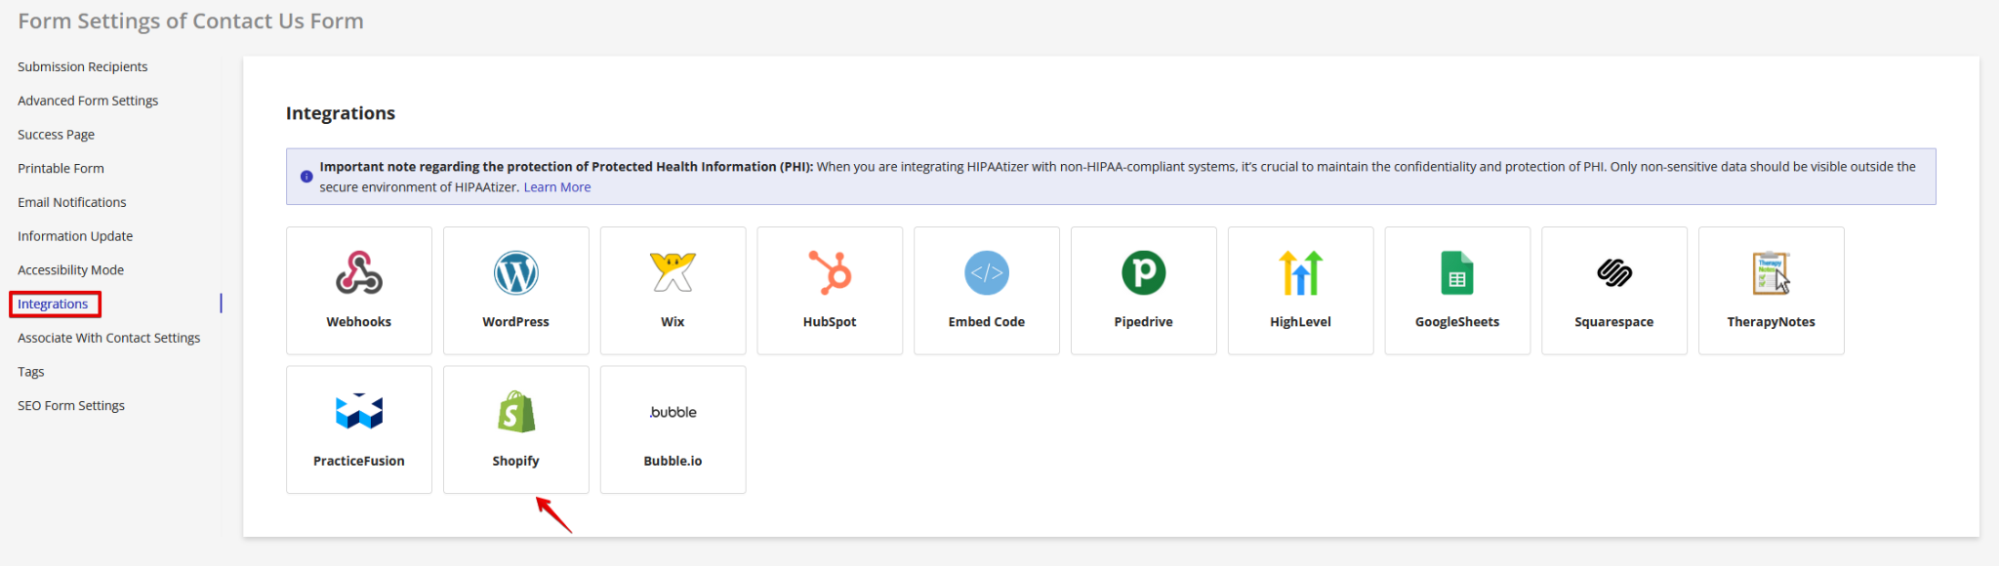
Scroll down to ‘Copy and Paste the Embed Code’, and copy the script in the indicated box.

PLEASE NOTE: The embed code for each form is unique to that form. If you want to embed more than one form, repeat steps 4 and 5 for each individual form.
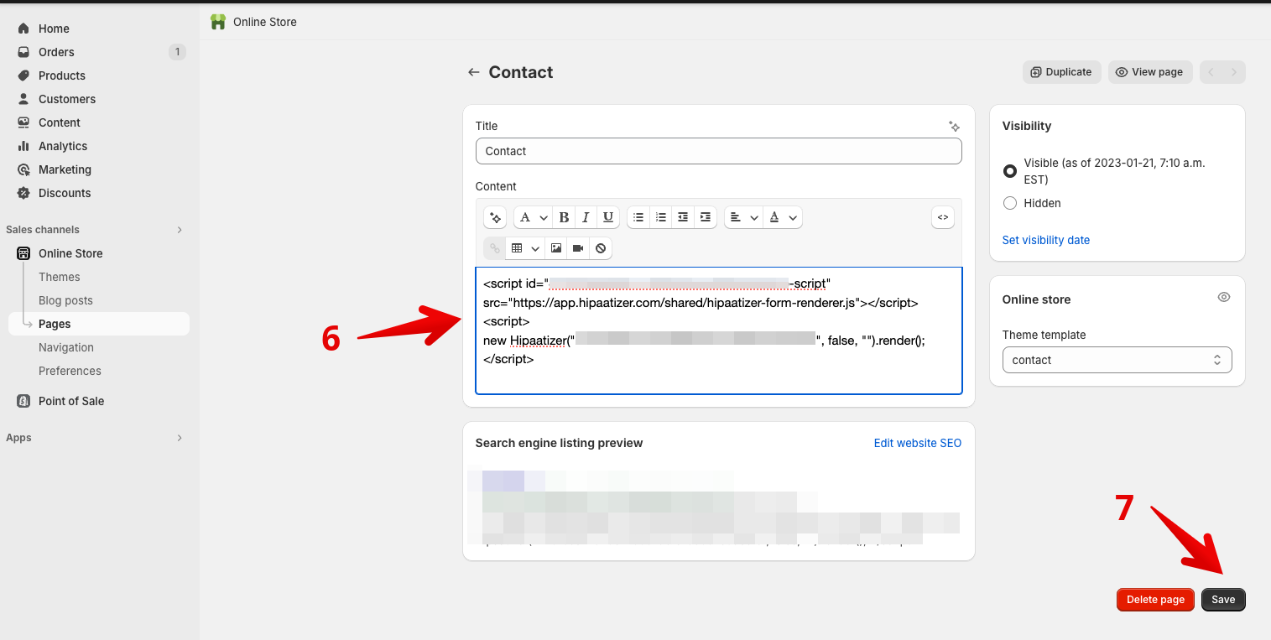
Step 6. Paste the copied code into the HTML view of your Shopify page in the Content section where you want the form to appear.
Step 7. Save Your Changes: After pasting the embed code, click the “Save” button at the bottom of the page to apply your changes.
Your HIPAAtizer HIPAA-Compliant form is now successfully added to your Shopify website and should be visible on the page you selected. If you encounter any issues or need further assistance, please don’t hesitate to reach out for support.
Still have questions? Contact us