These instructions are for Developers and others operating in “Developer” Mode.
To make a form HIPAA Compliant and remove the watermark that appears on forms that are in a Developer’s dashboard, a Covered Entity account must be activated with HIPAAtizer and the forms must be activated from the Covered Entity account.
To initiate the activation process from a Developer account, follow the steps below:
Step 1. Invite a Covered Entity.
Go to Menu > (1) Team, then click on (2) “Covered Entities” and click (3) “Invite User”.
In the modal window, (1) enter the relevant information for the authorized person at the Covered Entity. Make sure that the role is set to (2) “Covered Entity” and, if you have a new form to share with the client, you can attach it here (3). When you are finished, you click “Send” and an invitation will go to the Covered Entity.

Step 2. The Covered Entity will receive an email to create an account with HIPAAtizer.com, choose a subscription package and accept the HIPAAtizer Business Associate Agreement (BAA).
Once they set up the account, the form will be in their “My Forms” dashboard. This form is a duplicate of the form in the Developer account. Changes that you make to the form in your dashboard will not be reproduced in the form in the Covered Entity’s dashboard. If you want to subsequently edit the form that the Covered Entity has on their website or in their dashboard, you must make the changes in their account. For more information on editing a form in a Covered Entity’s account, please see Step 3 of this instruction.
Developer accounts do not have access to form submissions and HIPAA-sensitive, protected health information.
Step 3. Accessing, Editing and Publishing a Covered Entity’s Forms:
You (The Developer) will receive an email notification once the BAA is accepted, and the Covered Entity can start using the HIPAA-Compliant form. It is ready to be edited, published or embedded on a website.
The Developer account can edit, publish or embed the form by accessing the Covered Entity’s Forms.
To access the Covered Entity’s “My Forms” dashboard:
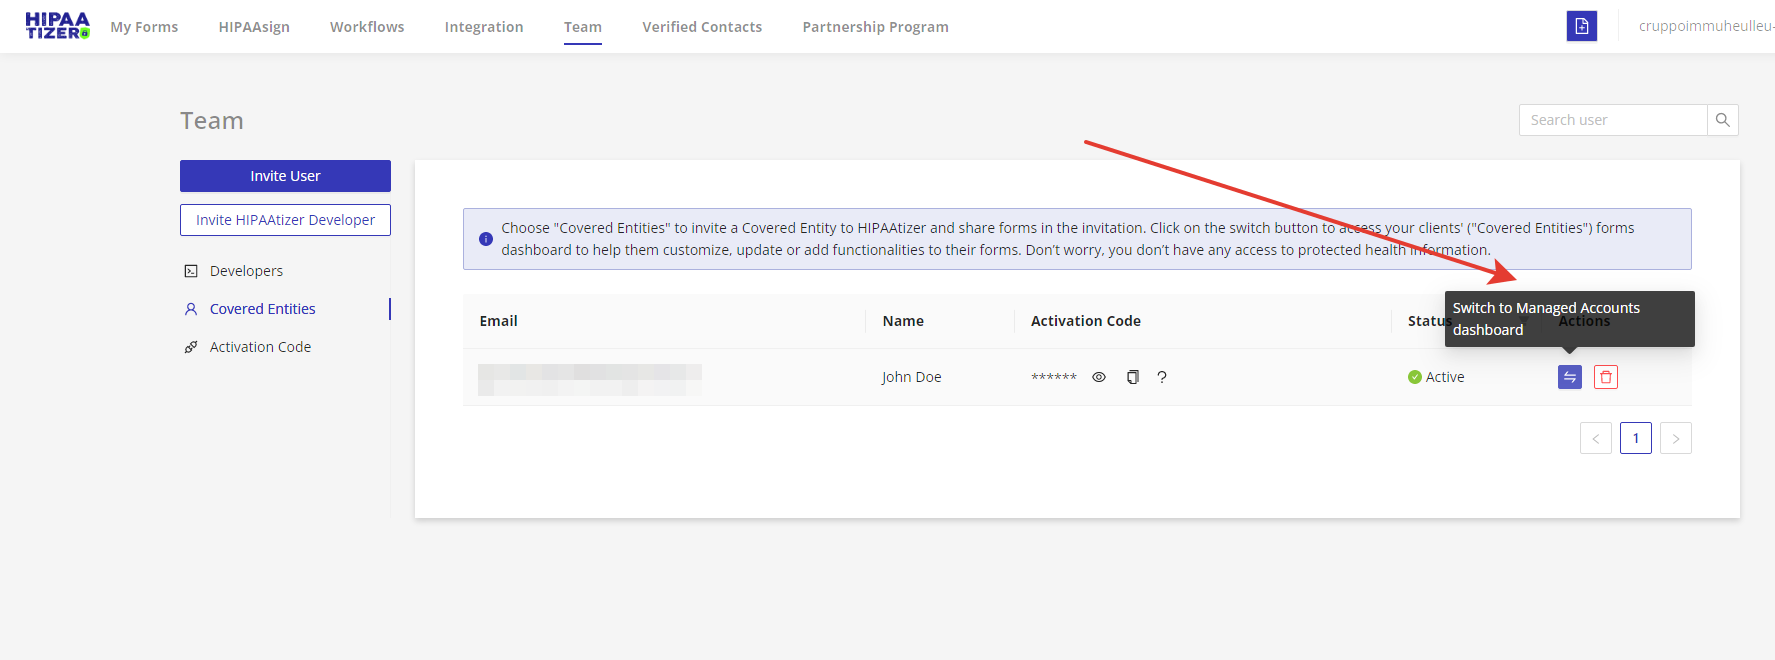
Go to Team > Covered Entities > Actions > Switch to Managed Accounts dashboard
And click on “Embed Form”:

Step 4: Access the Integration and Embed Options.
Click on the “Integrate or Embed Form” tab to explore various options for embedding your form on your website or integrating it with third-party systems such as WordPress, Wix, HubSpot, and others.
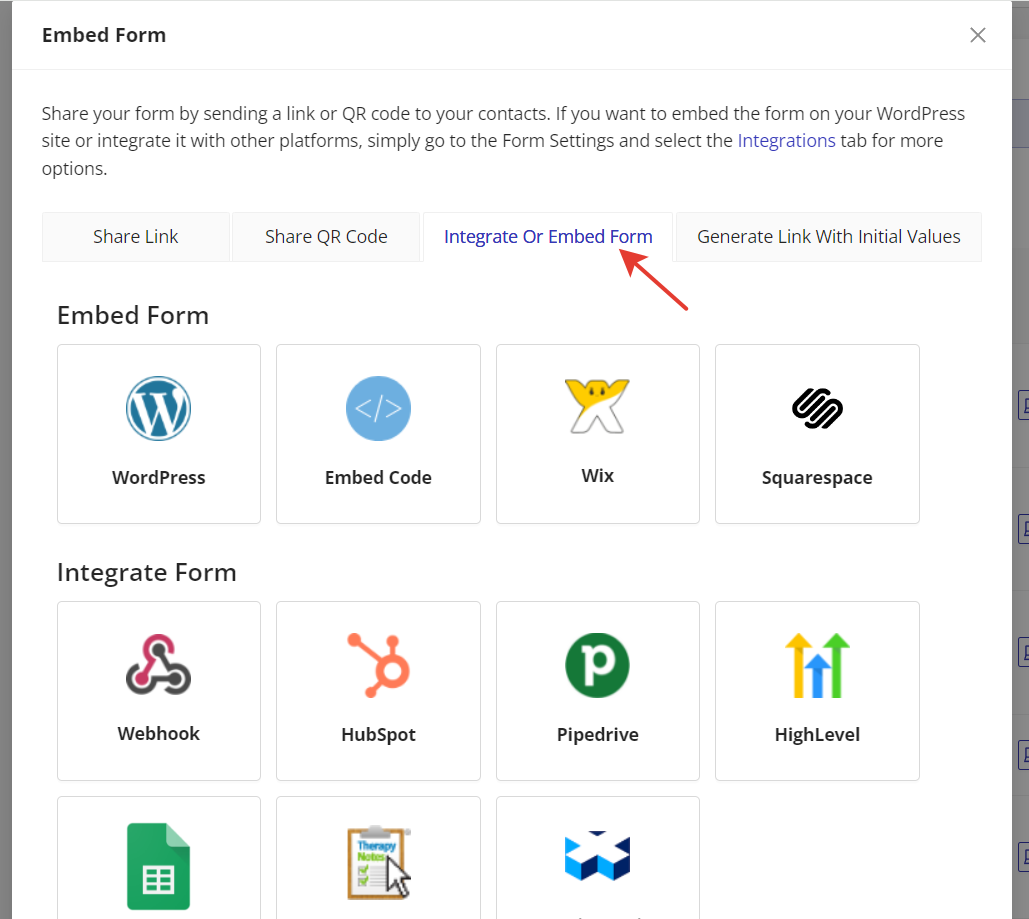
Step 5: To Embed a Form, click on the Embed Code icon
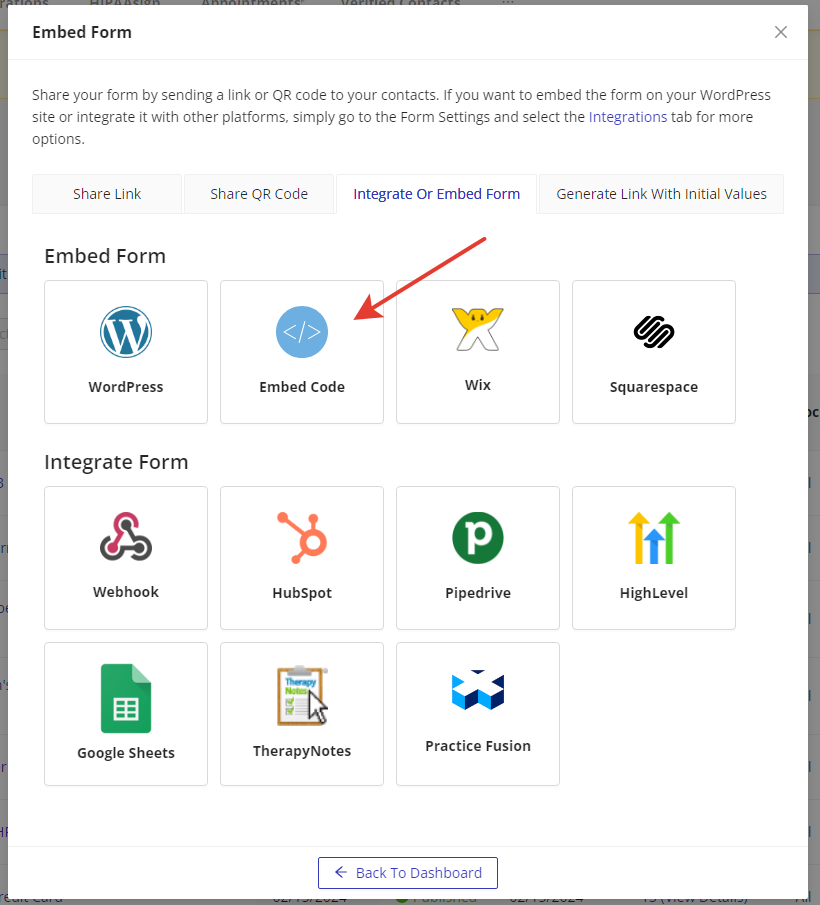
Step 6: Embedding the Form
After clicking on the “Embed Code” icon, you will see the code that needs to be embedded (see next screenshot) for the form. To embed the form in a website, you should copy the embed code and paste it before closing the “body” tag on your website.

For websites created with WordPress, you can add your HIPAAtizer forms using either the WordPress Gutenberg component:
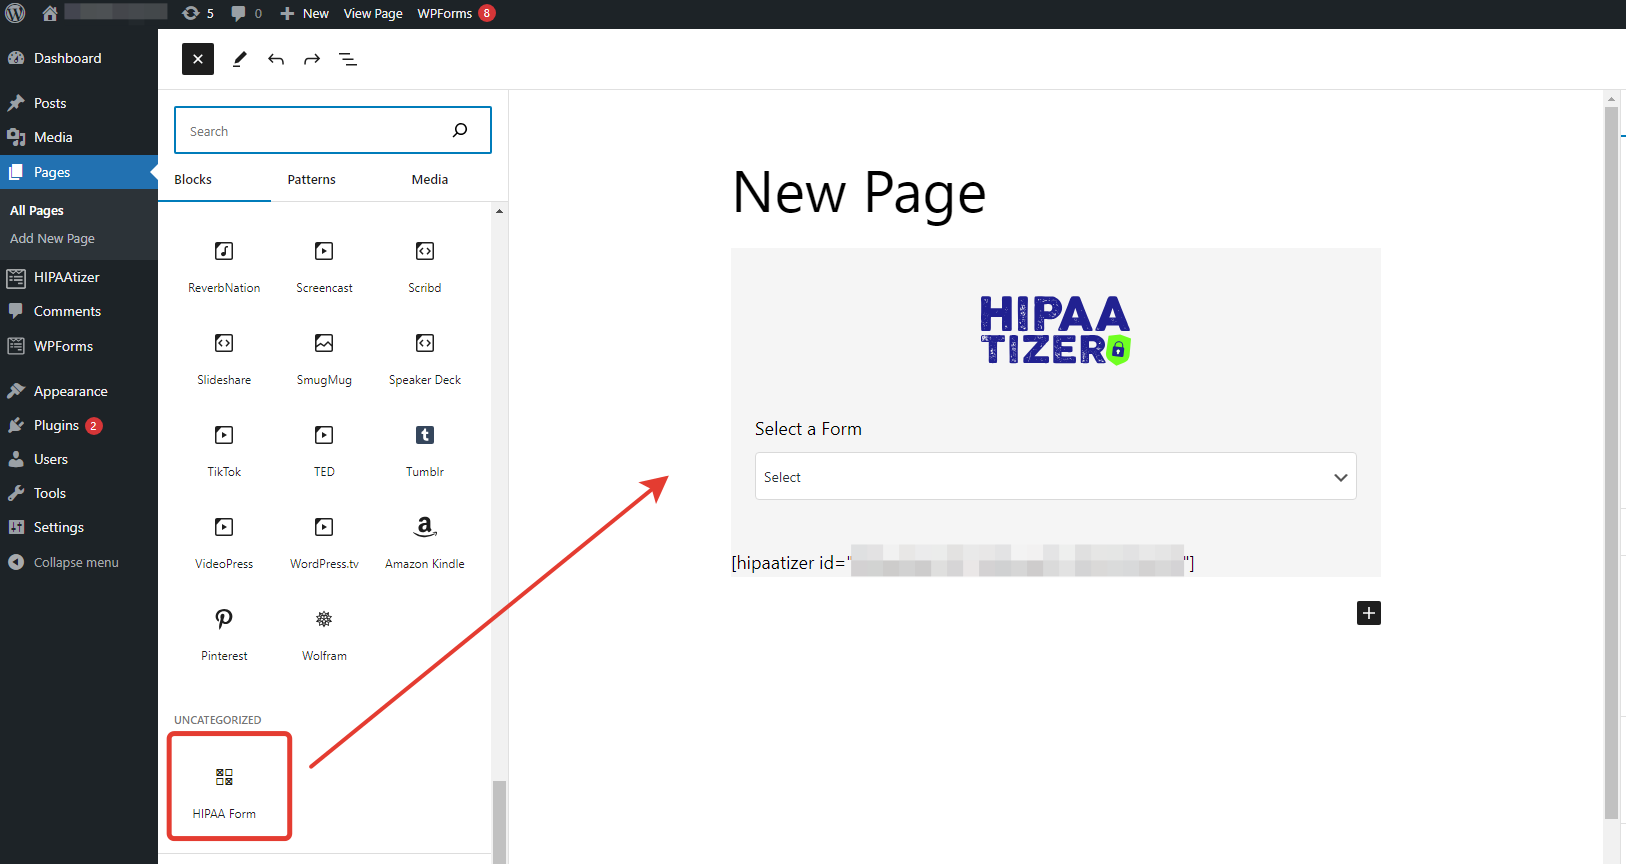
or shortcode:

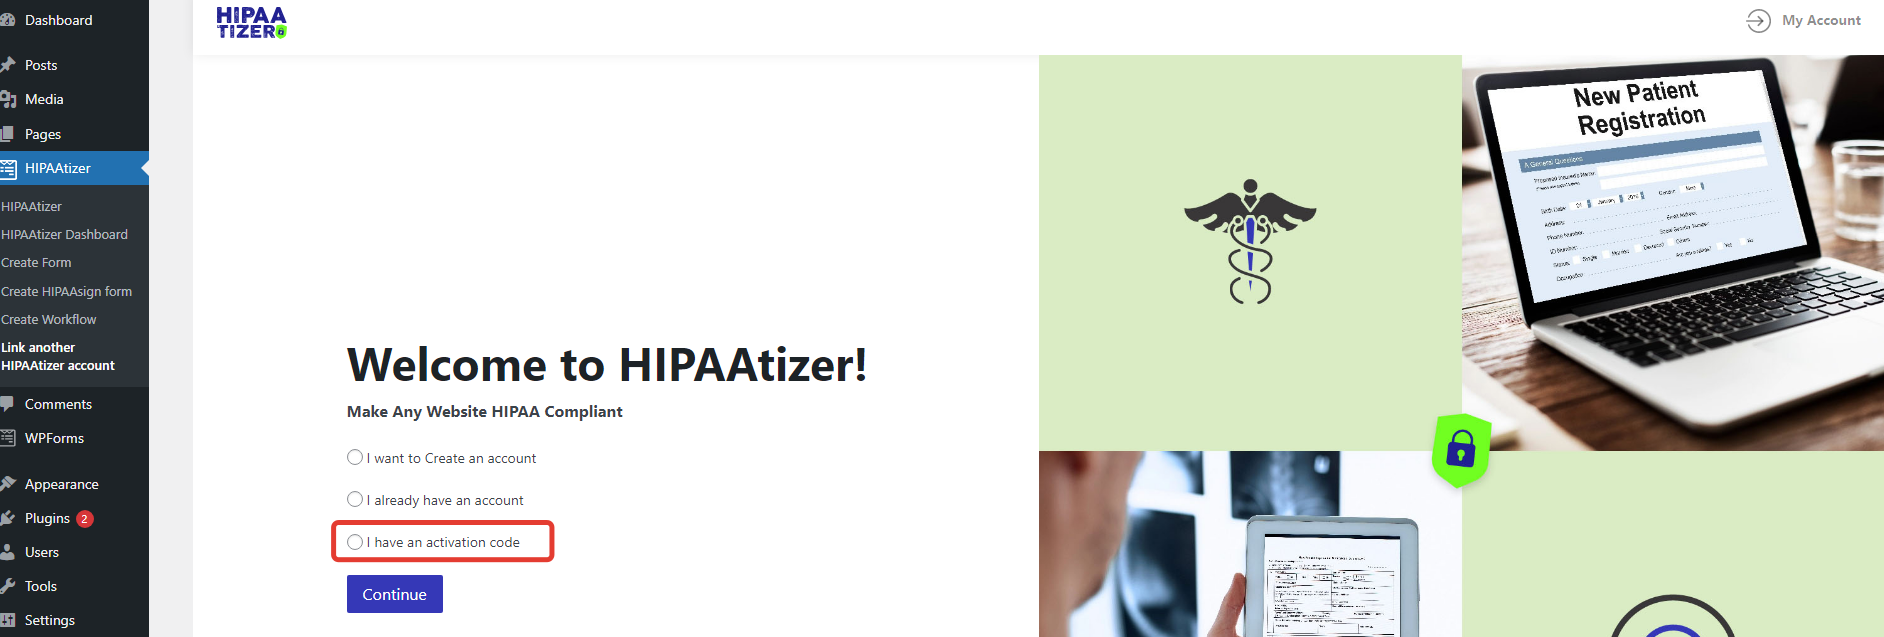
As a developer, you can access your forms or your client’s (the Covered Entity’s) forms in WordPress by logging in via the Activation Code.
To access your forms, please locate your Activation code in the WordPress plugin on the Team page, under the Activation Code tab.

The activation code for accessing Covered Entity forms will be sent to your email inbox in a message from HIPAAtizer once the Covered Entity you invited activates their account.
To access the Covered Entity forms in your WordPress account, navigate to your WordPress account and click on “Link another HIPAAtizer Account” on the My Forms page or in the left navigation under the HIPAAtizer menu.

Then, select the option to login via the Activation Code by clicking on “I have an activation code”.
Once you’ve embedded the form and activated it, the form is ready to use!
Editing Your Client’s Forms
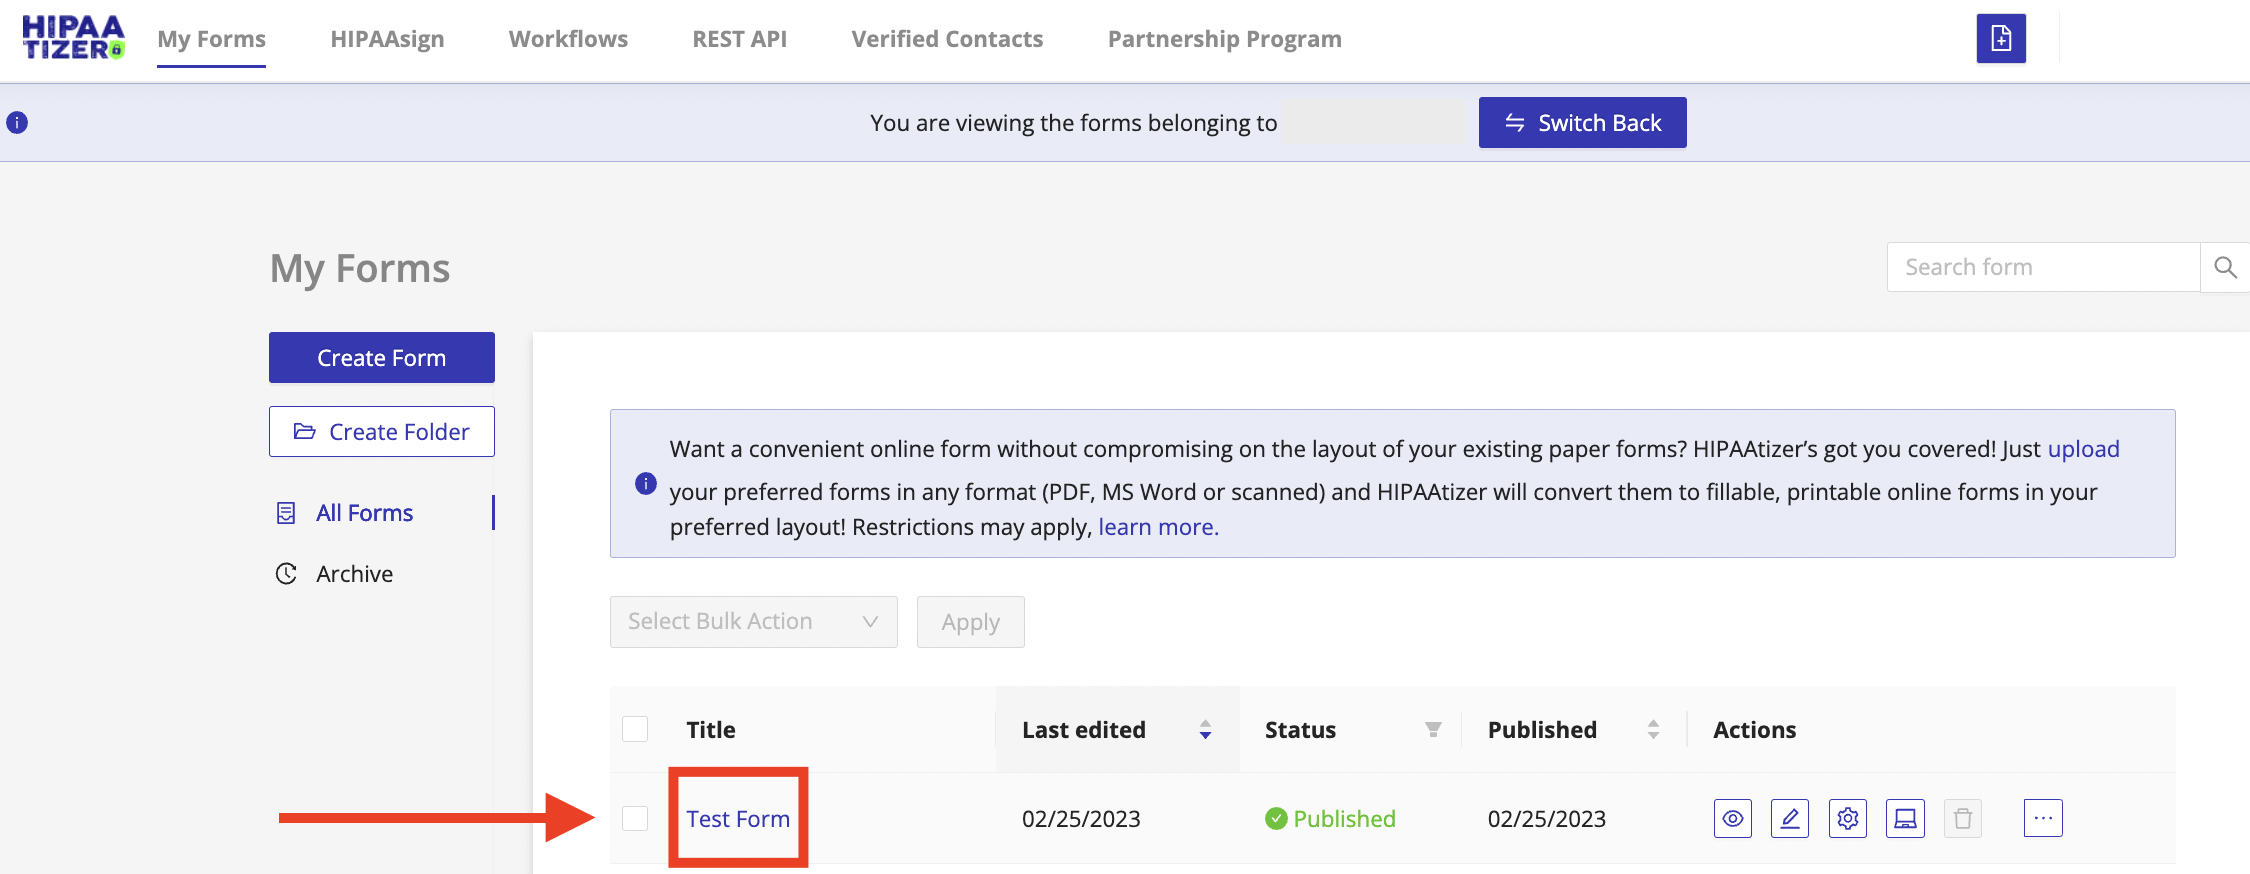
If your client wants you to edit any part of the form, such as add a new field or change a field’s label, make sure that you have “switched” into their account (See Step 3), then click on the form name. In this example, click on the form titled “Test Form” and the form builder will open. Once the form builder is open, you can make the necessary changes.
Please note: Any duplicates of forms in your Developer account are different from the forms in the Covered Entity’s account. Therefore, if you change the form in your Developer account, you are not changing the Covered Entity’s form. You can tell that you are in the Covered Entity’s account by the “Switch Back” button visible at the top:
If your client wants to change form settings, such as add or edit a print template, adjust email notifications and others, you can access these settings from “Form Settings”, see the screenshot just below:

If you have any questions, you can always reach out to us at support@hipaatizer.com
Other Instructions:
Still have questions? Contact us
